Is your air conditioner struggling to keep your home cool? Are your energy bills climbing despite normal usage? The culprit might be dirty coils hiding inside your AC system. The evaporator coils work to transfer heat from your home’s air, and keeping them clean helps them stay efficient. Many don’t realize that simple maintenance like this can support HVAC efficiency and even extend the system’s lifespan. This guide will walk you through how to clean an evaporator coil safely and effectively.
The Impact of Dirty Coils
When collecting dust, dirt, and grime, they create a barrier between the refrigerant and the air passing over them.
This insulating layer prevents efficient heat transfer, forcing your system to work harder and longer to cool your home. Research shows that dirty coils can reduce cooling capacity by up to 30% while increasing energy consumption by 25%.
For the average household, this translates to roughly $25-40 in wasted energy costs each month during the cooling season. Over time, the strain on your system can lead to:
- Decreased cooling performance
- Higher electricity bills
- Excessive wear on components
- Shortened system lifespan
- Reduced indoor air quality
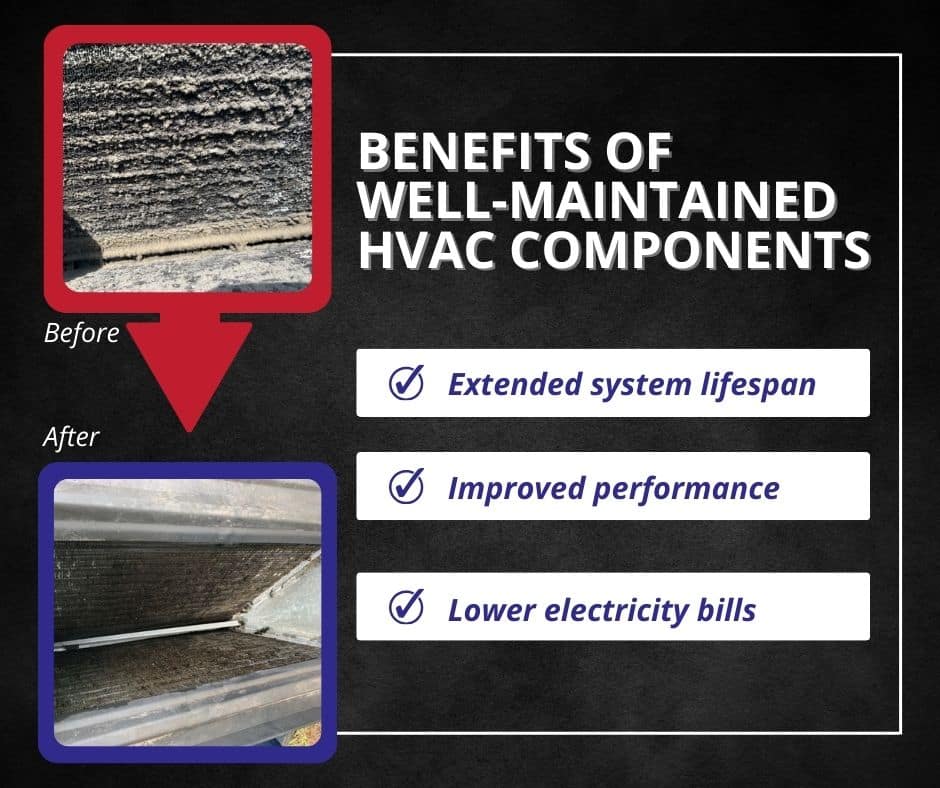
A clean evaporator coil not only saves energy (these coils are not cheap to replace, either) but also provides more consistent comfort throughout your home. When air flows freely through clean coils, you’ll notice more even cooling and fewer temperature fluctuations.
Spotting Trouble: Is It Time for a Cleaning?
Your AC system might be quietly showing signs that the evaporator coil needs a good cleaning. Look for these telltale indicators:
- Your home takes longer to cool than it used to
- Some rooms feel warmer than others despite thermostat settings
- The system runs constantly without reaching the desired temperature
- You notice musty odors when the AC runs
- Your energy bills have increased without explanation
- Ice forms on the refrigerant lines or outdoor unit
- The air coming from vents feels less cool and powerful
Seasonal timing matters, too. In humid climates, evaporator coils often need cleaning annually or even semi-annually.
Smart Prep Before You Clean
Safety comes first when working with any HVAC system. Before starting your cleaning project:
- Turn off the power to the air handler at both the thermostat and the circuit breaker
- Gather necessary tools: screwdriver, soft brush, hand spray bottle, commercial coil cleaner (or homemade solution), gloves, and mask
- Place towels around the work area to catch drips and protect the flooring
- Take photos of the internal components before disassembly to help with reassembly later
This task requires basic DIY skills but no specialized knowledge. Expect to spend about 1-2 hours from start to finish, depending on your system’s accessibility and condition.
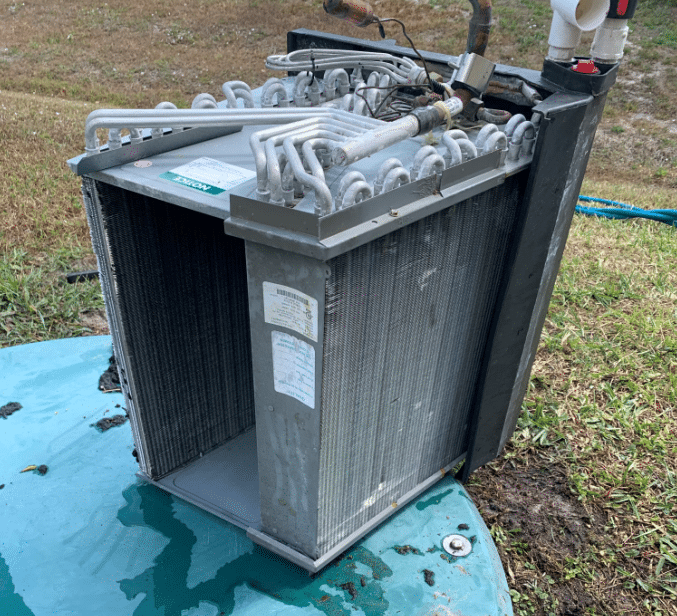
Finding the Coils
Evaporator coils are located in the indoor portion of your AC system, typically in the air handler or attached to your furnace. In most homes, you’ll find them behind an access panel on your air handler unit.
To locate and access your coils:
- Identify your air handler (usually in a closet, basement, attic, or dedicated utility room)
- Look for a removable metal panel on the front or side of the unit
- Remove the screws or fasteners holding the panel in place
- Carefully remove the panel to reveal the internal components
What you’ll see: The evaporator coil resembles a large A-shaped or N-shaped radiator with thin metal fins. Healthy coils appear clean and uniformly colored, while dirty coils show visible dust, dark staining, or even mold growth.
The Cleaning Process
Now for the main event—cleaning those coils:
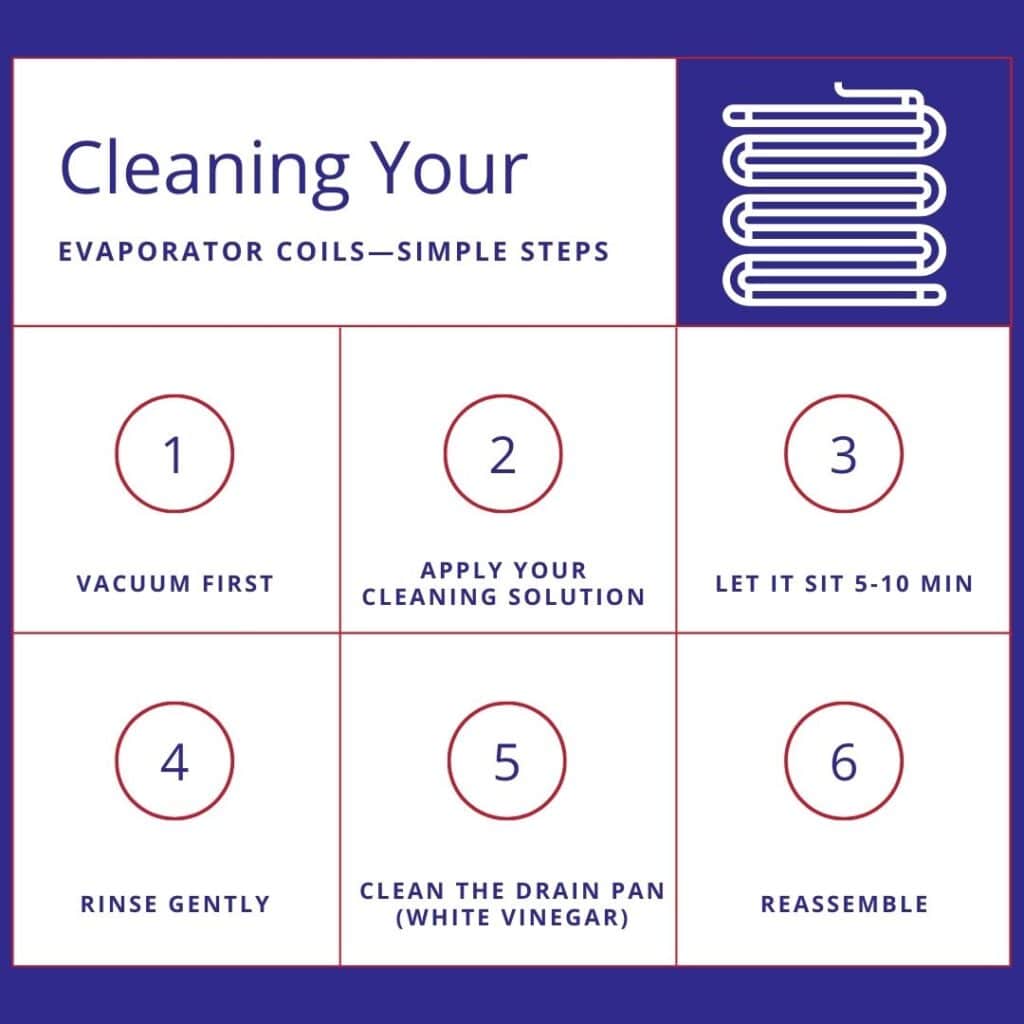
- Vacuum first: Use a soft brush attachment to gently remove loose debris from the coil surface. Move in the same direction as the fins to avoid bending them.
- Apply your cleaning solution: Whether using a commercial cleaner or a homemade solution, spray it evenly across the coils. For homemade options, mix equal parts warm water and white vinegar with a drop of dish soap.
- Let it work: Allow the solution to sit for 5-10 minutes to break down dirt and grime. This dwell time helps dissolve buildup without excessive scrubbing that could damage fins.
- Rinse carefully: Use a hand spray bottle with clean water to rinse the coils. Avoid using high pressure, which can damage the delicate fins.
- Clean the drain pan: While you’re there, clean the condensate drain pan beneath the coils and pour a cup of white vinegar down the drain line to prevent clogs.
- Reassemble: Once everything is dry, replace the access panel and restore power to the system.
You’ll know you’re making progress when the water rinsing off the coils changes from dirty to clear. Take your time with this process—rushing can lead to damaged components or incomplete cleaning.
Choosing Cleaning Solutions
The best cleaning solution depends on your coils’ condition:
- Light dust and dirt: A simple mix of warm water with a few drops of dish soap works well
- Moderate buildup: Equal parts warm water and white vinegar
- Heavy grime or mold: Commercial foaming coil cleaner (no-rinse varieties are best for tight spaces)
Professional technicians often use biodegradable foaming cleaners that expand into the coil depth and rinse away with condensation. These products cost $10-20 at home improvement stores and are worth the investment for annual maintenance.
Avoid bleach, ammonia, or caustic cleaners, which can corrode the metal coils and release harmful fumes into your home’s air system.
Prevention Strategies
Keep your evaporator coils cleaner longer with these preventive measures:
- Upgrade your air filter: Use a MERV 8-11 rated filter and check it monthly
- Create a reminder system: Schedule filter changes on your phone calendar
- Maintain clearance: Keep the area around your air handler clean and unobstructed
- Control humidity: Keep indoor humidity between 30-50% to prevent mold growth
- Schedule seasonal check-ups: Mark your calendar for the beginning and end of the cooling season
The most effective prevention method is simply changing your air filter regularly. In most Florida homes, check monthly and replace every 1-3 months, depending on household factors like pets, allergies, and construction activity.
Beyond the Coils: Connected Maintenance
Evaporator coil cleaning works best as part of a comprehensive AC maintenance approach:
- Clear your condensate line: Pour a cup of vinegar down the drain line quarterly to prevent algae buildup
- Clean your return vents: Vacuum dust from return grills monthly
- Maintain outdoor condenser coils: Rinse the outdoor unit with a gentle water spray to remove debris and maintain airflow
- Check your ductwork: Have ducts inspected for leaks every 3-5 years
These connected maintenance tasks ensure proper airflow throughout your system, which directly impacts how quickly your coils get dirty again.
When to Step Back and Ask a Pro
If your system just isn’t efficient like it used to be and you’re curious about what to do, blower door and duct testing can help. Similarly, if you’re replacing any of your HVAC equipment, you should make sure that the household demand and equipment selection are optimal—Knockout can do this for you.
While DIY coil cleaning is manageable for many homeowners, certain situations call for professional help:
- You can’t access the coils safely
- You notice refrigerant lines with frost or ice (potential leak)
- The coils show signs of damage or corrosion
- Previous cleaning attempts haven’t improved performance
- You’re uncomfortable working with electrical components
If your system is over 10 years old or hasn’t been serviced recently, professional cleaning may be best.
Conclusion
Clean coils can reduce energy costs, extend your system’s lifespan, improve indoor air quality, and help you avoid emergency repair visits.
For most homeowners, cleaning (or having a professional clean) your evaporator coil once a year before summer’s peak heat provides the best balance of system protection and maintenance effort.
At KO Inspections, we see firsthand how proper maintenance protects one of your home’s most valuable systems. Have questions about your home’s efficiency or HVAC performance? Contact our team today and get expert advice tailored to your specific situation.